I have been on a mission since we returned from our summer holidays: to declutter the house of all the items we do not use or love. I have, of course, tried this many times in the past but this year I have my serious hat on. No cupboard is safe. It is time for all those unused items to go. That is until I reached the cupboard that has housed all my baby clothes. 4 precious, beautiful girls equals a LOT of clothes I can assure you. And each one is a trip down memory lane as I recall who gave it to us as a gift or what occasion/s it was worn on. I dare say I could give you this information for almost every item of clothing my girls own. So, what to do with it all?
For us, we are done having babies {sigh} but these items really tug at my heartstrings and I have struggled to let them go. I have put aside one special outfit that I associate with each of my girls as a tiny baby to keep in their memory boxes but that didn't seem to be quite enough. And so back into the cupboard it went.
I recently came across a lovely idea that I think might just be the answer to my sentimental side. It is called a memory quilt. I have seen them made out of favourite t-shirts before but never thought about making one out of those favourite baby clothes. My heart sang when I saw this. It was just what I have been looking for; a way to preserve those items I love but in a new, practical form.
I am pleased to report that I have now sorted through ALL my baby clothes (many, many tubs full!) and I have put aside the special pieces I want to include in my memory quilt. All of the others I have either listed on a local Buy, Swap, Sell site or given away. You cannot believe the amount of cupboard space I have reclaimed. And I feel like a weight has been lifted too.
I can't wait to start assembling my own memory quilt. It will be something I can treasure forever. I may even use it to cover my grandchildren one day. Who knows?
(* Photos of memory quilts from www.maidenjane.com)
Showing posts with label craft. Show all posts
Monday, 11 February 2013
Tuesday, 29 May 2012
A bit of creative fun
Recently I came across a great, cheap crafty idea that I thought my little girls particularly would enjoy. Of course, since the big girls have seen it, they are also keen to give it a go. It used common kitchen ingredients and required very little set up. So, the next time I was babysitting, I thought I would give it a test run with the kids. Let's just say it was a huge success. Master 4, Miss 2 and of course, Josie-rabbit, had a ball. Check it out for yourself.
Ingredients required: bicarb soda, vinegar and food colouring. You will also need a reasonable size dish (I used glass), a medicine dropper (I purchased a couple of small droppers at the chemist for about $3 each) and a few dishes for different coloured vinegars (I used ramekins).
Pour a layer of bicarb soda in the bottom of the dish. Add food colouring to several small dishes of vinegar. Use the medicine dropper to draw up the vinegar and then squirt it on to the soda to form patterns. The soda will bubble up when the vinegar is dropped onto it which is fun for the kids to watch too.
Suffice to say, the kids enjoyed this activity and it kept them occupied for ages. Great for their fine motor skills and colour recognition too. We also talked about what colours you can make when you mix the colours together. And as for the clean up, wash it down the sink with a jug of boiling water and you can clean your drains at the same time. Nothing like multi-tasking!
Tuesday, 20 March 2012
Sand Art
School holidays are fast approaching and I am thinking about activities I can do with the girls. This is one that we did a while back but I thought I would share it as the girls really enjoyed it. They had asked on several occasions to do sand art when we have been at fairs and the like. The jars are pretty but it is a very quick activity .... they pour the sand into the jar in different coloured layers, it is all done and then you hand over the money. So I was very excited when I discovered that they could make it themselves at a fraction of the price and we would get a longer lasting activity out of it too.
You will need a bag of table salt, coloured chalk, a sheet of paper and some glass jars for this activity. A word from the wise: You will NOT need a 10kg bag of table salt! Been there, done that. A little goes a long way. The jars in my photo I found at Ikea (love that store) and were quite inexpensive but you can use any size or shaped jar you like.
To colour the salt, spread a small amount on a sheet of paper. Then just rub the side of the chalk over it until it is all coloured. The more you rub it with the chalk, the darker the salt will be. Then bend the paper in the middle and use it as a shute to put the sand into the jar. Repeat with as many colours as you like. Easy.
Tuesday, 6 December 2011
Tree Decorating for Kids
I love to decorate the Christmas tree and this is something I have also passed onto my girls. Up until a couple of years ago, we actually had 2 Christmas trees; one for me and one for them. (Mine was barricaded inside the playpen but that's a whole 'nother story.) The girls' tree was their height and the decorations were non-breakable. They would spend hours throughout December decorating it, then taking all the decorations off and decorating it all over again. Great for entertainment value but oh the mess all those little green pine needles made all over the floor ... constantly! 2 years ago, I conceded defeat and allowed them to help me decorate the big tree but they are not allowed to rearrange it every day and I think they have missed this.
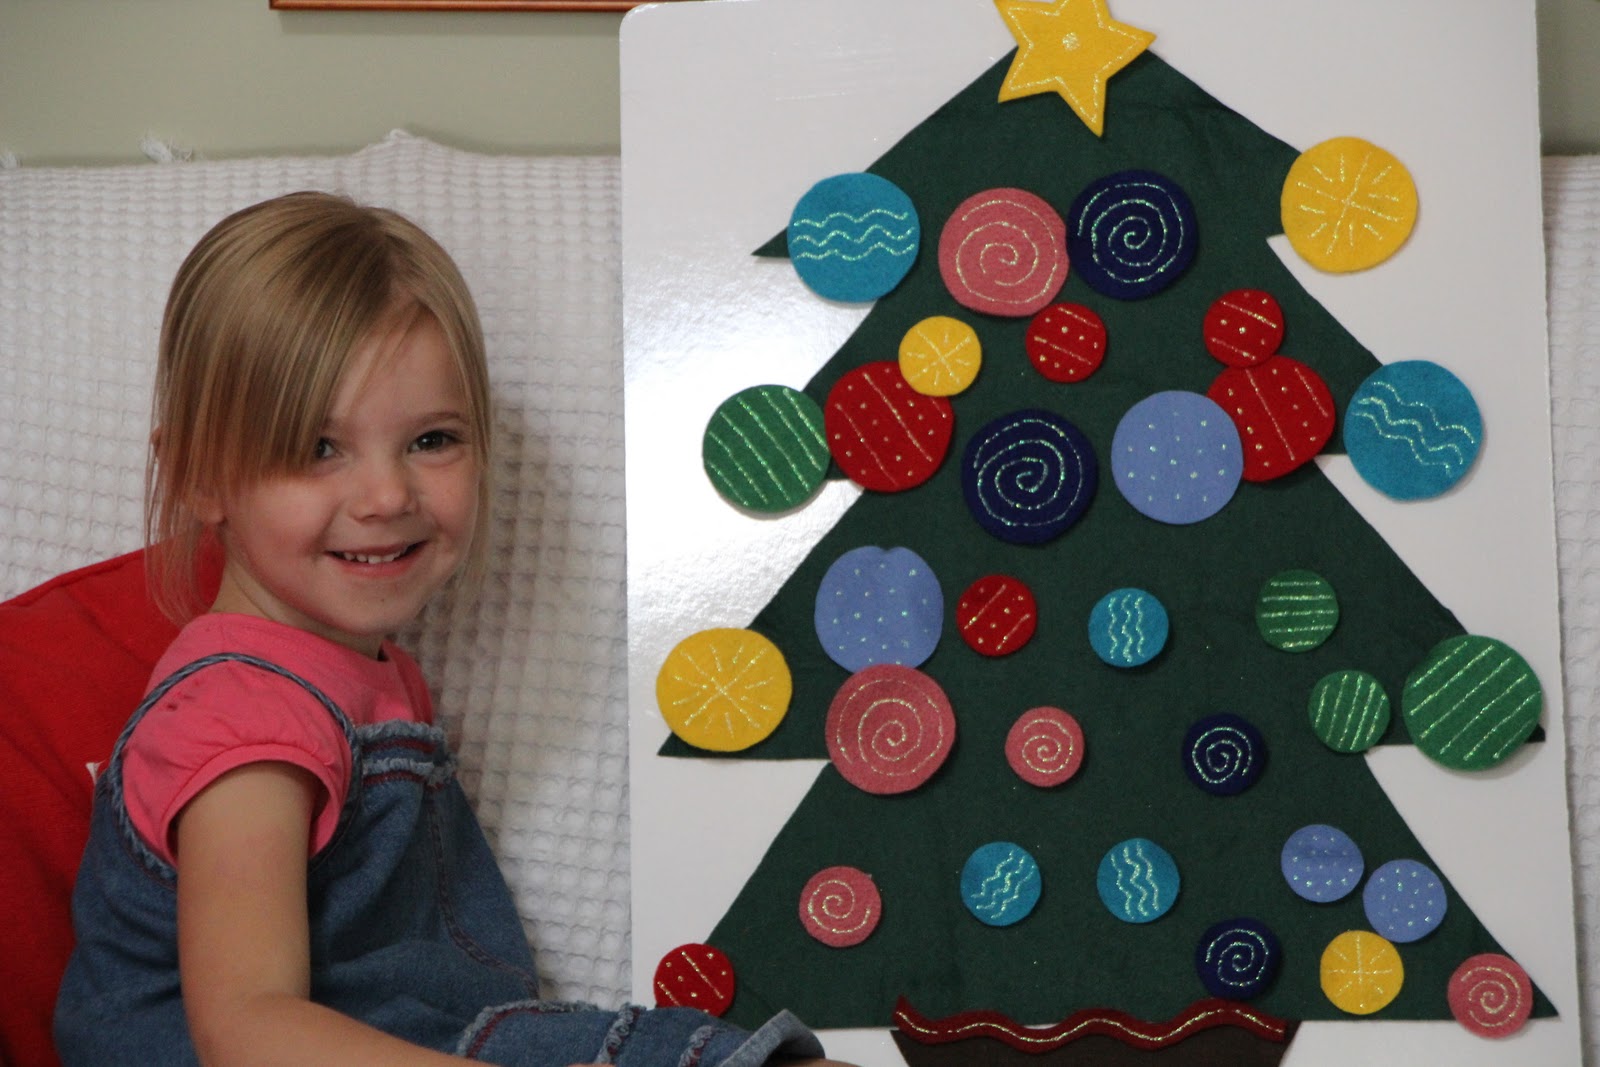
So I was inspired when I saw a felt Christmas tree on Pinterest (yes, I know, the source of all inspiration these days). No pine needles to drop and the girls can decorate (and redecorate) to their hearts content. I am not sure whether I should admit this, but I happened to have all the materials I needed for this little project in my craft cupboard. I had planned to do something else with it a long time ago and had never quite gotten around to it. To make your own felt tree, all you will need is a large piece of green felt and several scraps of coloured felt. I cut out different sized circles and then blinged them up with some KindyGlitz (everything is better with KindyGlitz - you just have to trust me on that if you haven't used it before yourself.) I also added some velcro squares to the back of the circles and the tree.
I finished it last night and left it on the coffee table . When I got up this morning, Alison had already tried it out and the little girls were excited to give it a go. It doesn't keep them entertained for quite as long as the real tree decorating did but then it doesn't make the mess either and that makes it a winner in my book.
So I was inspired when I saw a felt Christmas tree on Pinterest (yes, I know, the source of all inspiration these days). No pine needles to drop and the girls can decorate (and redecorate) to their hearts content. I am not sure whether I should admit this, but I happened to have all the materials I needed for this little project in my craft cupboard. I had planned to do something else with it a long time ago and had never quite gotten around to it. To make your own felt tree, all you will need is a large piece of green felt and several scraps of coloured felt. I cut out different sized circles and then blinged them up with some KindyGlitz (everything is better with KindyGlitz - you just have to trust me on that if you haven't used it before yourself.) I also added some velcro squares to the back of the circles and the tree.
I finished it last night and left it on the coffee table . When I got up this morning, Alison had already tried it out and the little girls were excited to give it a go. It doesn't keep them entertained for quite as long as the real tree decorating did but then it doesn't make the mess either and that makes it a winner in my book.
Thursday, 24 November 2011
Christmas Advent Jar
I have been crafting up a storm this past week so I will have several projects to share in the next few days. One of the things I have been working on is my Christmas Advent Jar. My girls love the chocolate advent calendars and they have amazing powers for encouraging (read 'bribing') good behaviour but I wanted something that would also remind us to do something special together each day in December.
So I bought a few boxes of matches, emptied them of their contents, wrapped them in papers to coordinate with our Christmas colour theme for this year and numbered them from 1 through to 24. Each box then has a strip of paper inside it which has a Christmas activity for the day (or night). I have put the finished boxes in a decorative jar which will sit on my kitchen bench come December first, next to the mini countdown board. The girls can take turns each morning at breakfast to pick out that days box and see what surprise lies in store for the day.
Might need to add a red ribbon to my jar before it takes pride of place on the bench. (And by the way .... I have 1200 matches that are now free to a good home lol)
If you would like to make your own Advent Jar but need some inspiration for the activities, you might like to check out this site http://justagirlblog.com/2010/12/christmas-advent-jar.html
Wednesday, 16 November 2011
A Crafty Christmas
As I mentioned in my profile, I love everything about Christmas. I already have my Christmas CD's ready to go come December 1! I love everything about the season .... decorations (I'm going red, white and blue this year), Christmas carols, baking and all the special food, getting together with family and of course, wrapping presents. I am almost finished my shopping with the help of my Christmas Planner (I'll share that in a post another day) so my thoughts turn to crafts.
My girls love their chocolate advent calendars each year, but I thought it would be nice to have a larger (colour coordinated lol) display for my kitchen bench to remind us how many days we have until Christmas. I created this with a mini clipboard (available from OfficeWorks for $2 or $3). Cover with scrapbooking paper and then decorate . Quick & easy. Each day I will just change over the numbers or perhaps I can give that responsibility to Miss Meg as she is always the first one up in our house.
I saw a cute shadow box with bells in it recently on Pinterest (my new favourite website - you have to check it out!) I made my own version with some gorgeous black & white photos I took of the girls last Christmas in their Santa hats. My thought is that this will be a decoration that will come out every year to remember my girls when they were so little.
I don't want to alarm anyone, but it is only 5 weeks til Christmas (and less than 2 weeks til I can break out the Christmas CD's).
Subscribe to:
Posts (Atom)